How to Add a Gmail Account in RustMailer

In this guide, we will walk through the steps required to add a Gmail account to RustMailer using OAuth2. This includes setting up a Google Cloud project, configuring OAuth credentials, integrating them into RustMailer, and finally syncing and viewing your emails. Screenshots are provided to guide you through each step.
Optional: Configure a Proxy for Gmail Access
Some networks may not allow direct access to Gmail services. If you're in such an environment, you need to configure a proxy before proceeding.
Go to Settings > Proxy, and create a new proxy for Gmail.

If your environment can access Gmail without restrictions, you can skip this step.
Step 1: Choose or Create a Google Cloud Project
Before creating an OAuth client, Google requires that it be associated with a project.
Go to the Google Cloud Console and either select an existing project or create a new one.
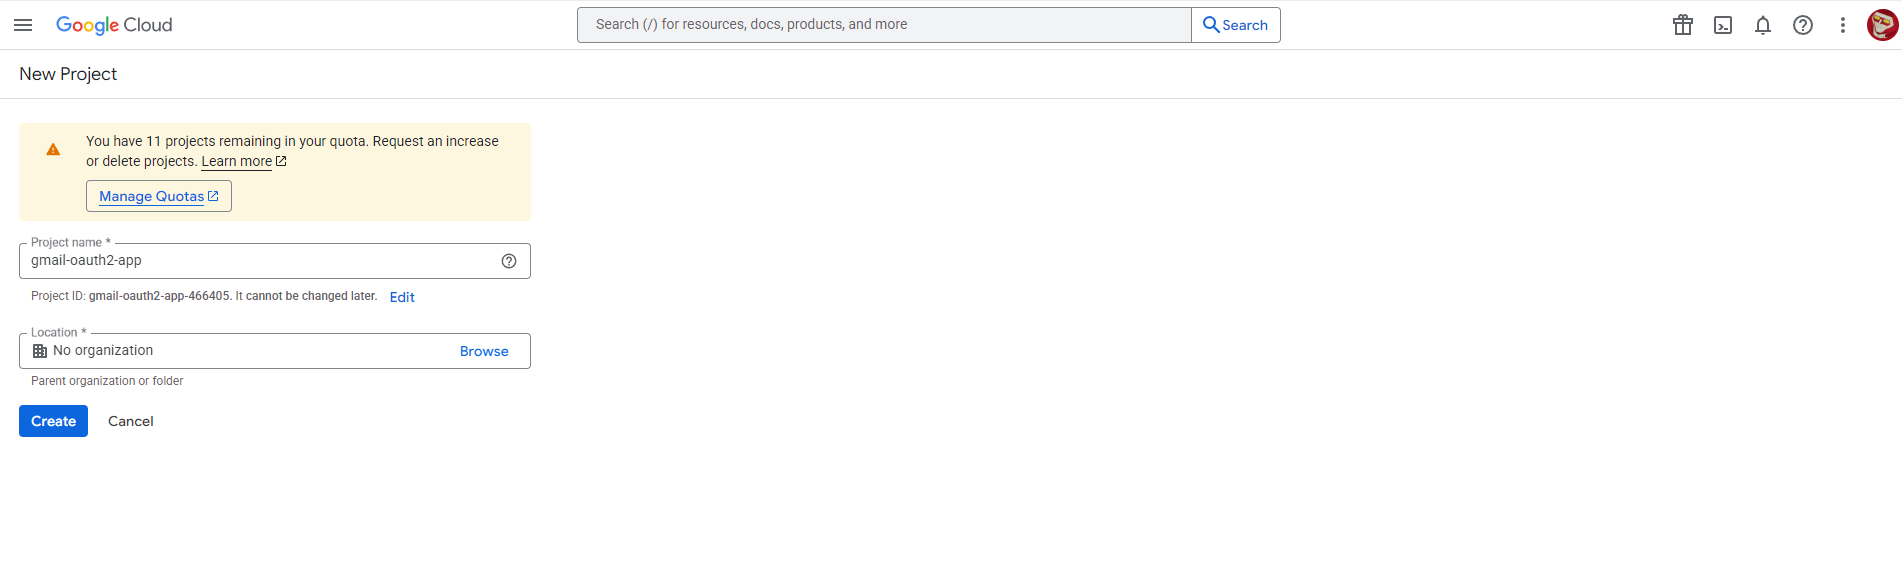
- Click the project selector at the top of the page.
- You can choose an existing project from the list, or click "New Project" to create a new one.
- If creating a new project, give it a name and click Create.
Once selected, you'll be able to proceed with creating your OAuth client within this project.
Step 2: Create OAuth Credentials for Gmail IMAP Access
To access Gmail via IMAP with OAuth2 authentication, you need to create OAuth credentials in your Google Cloud project.
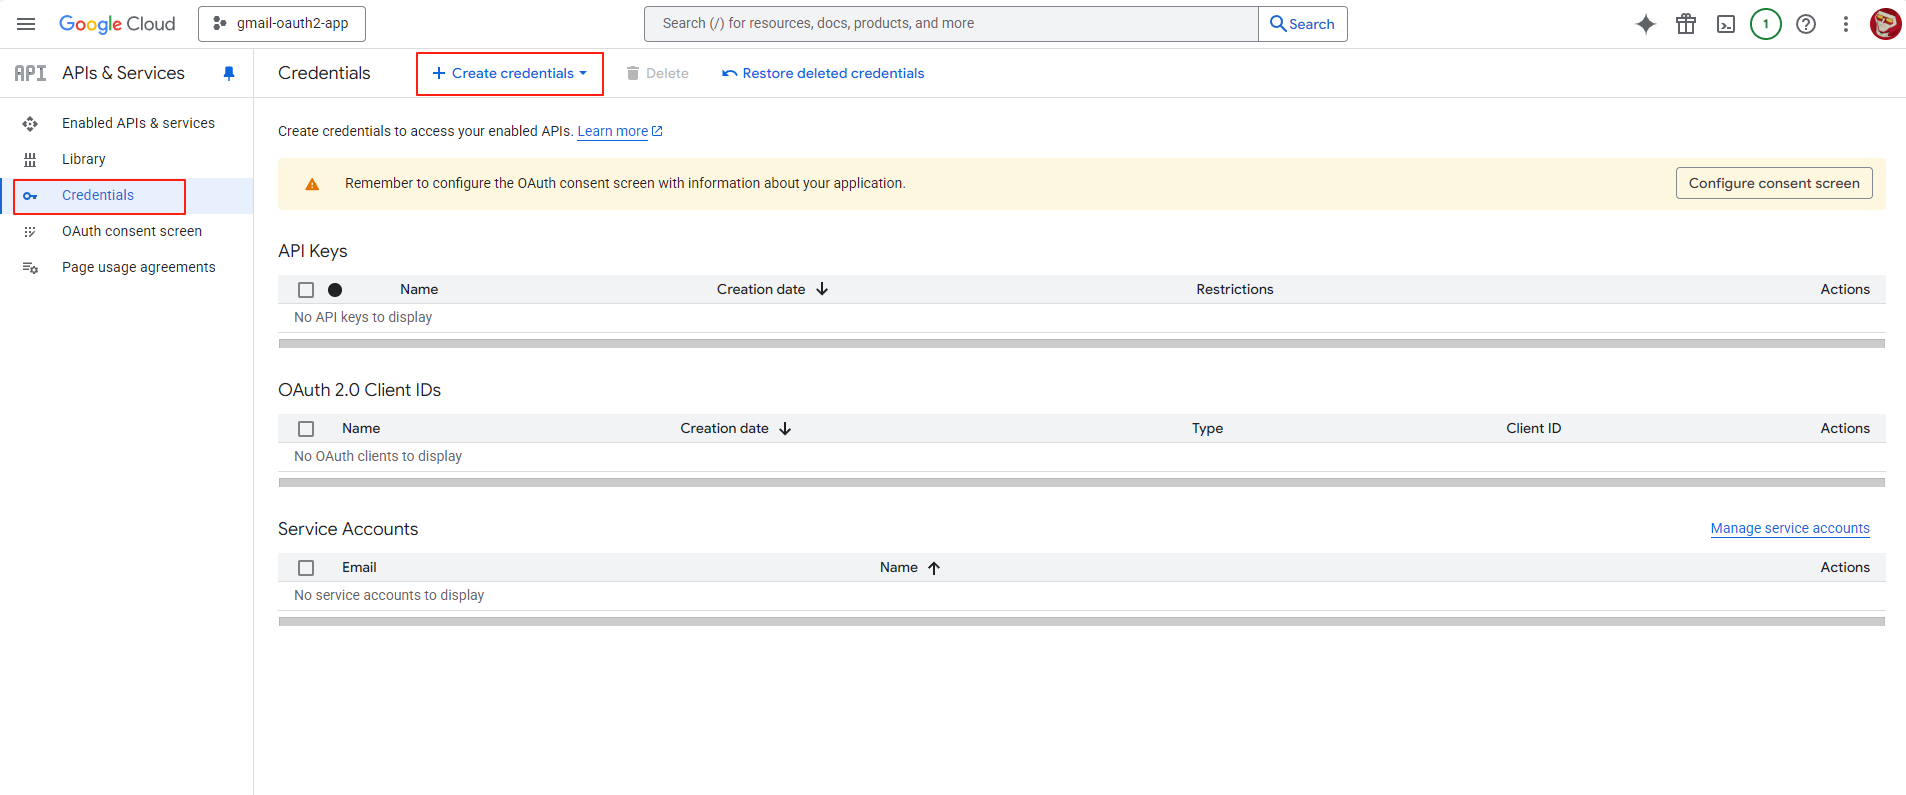
- Go to APIs & Services > Credentials in your selected Google Cloud project.
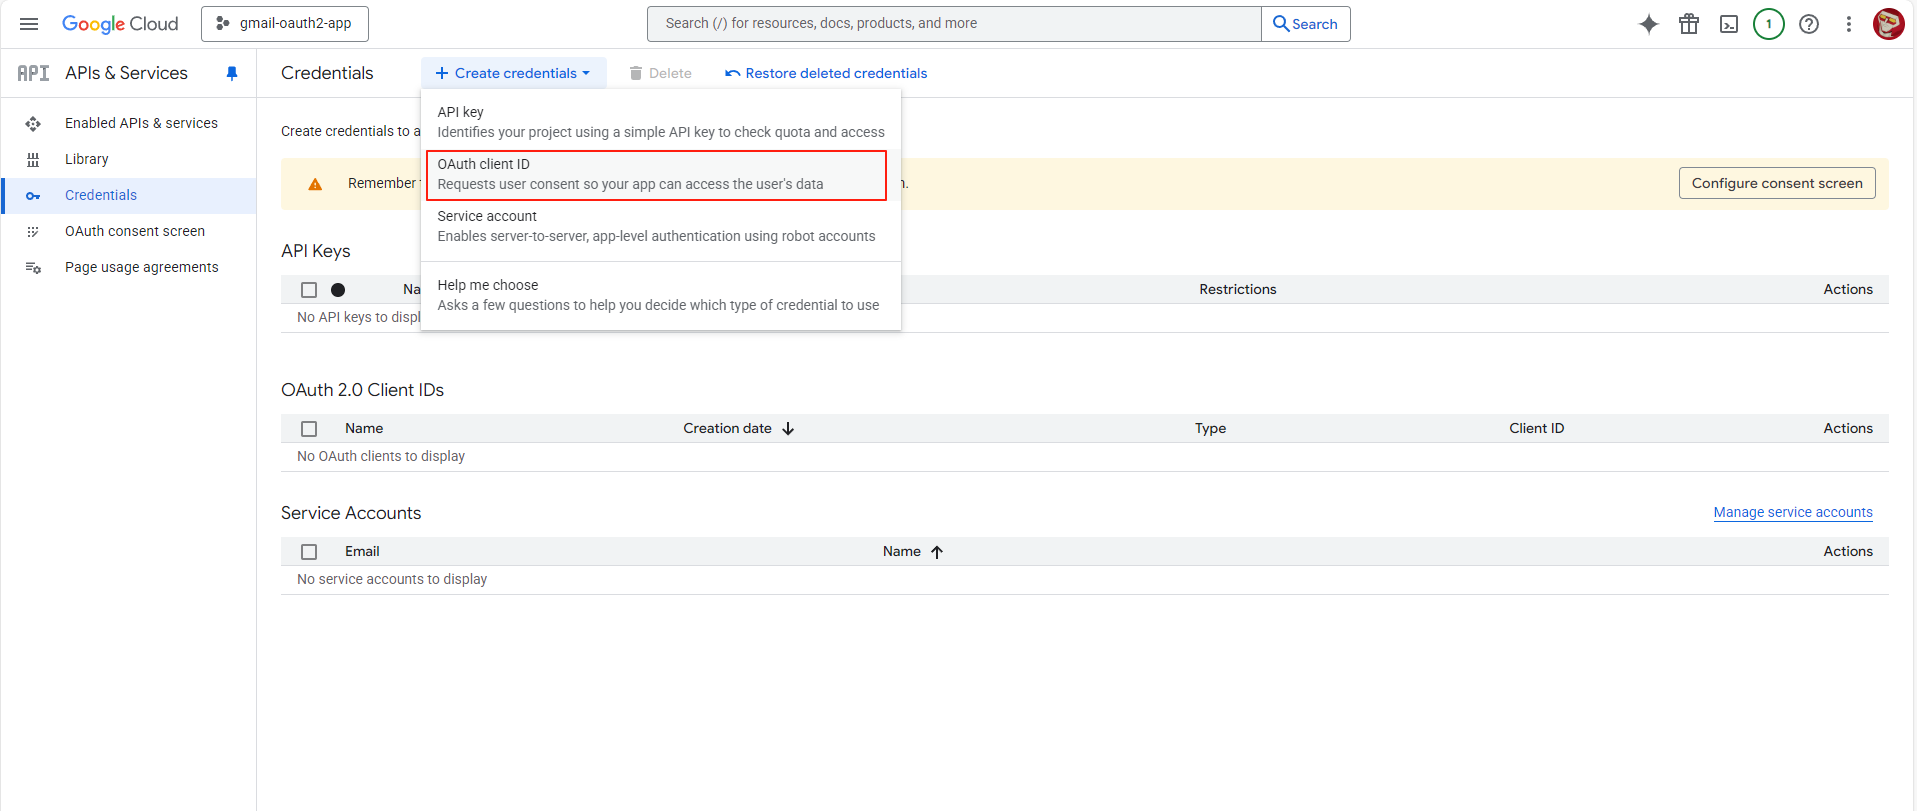
- Click Create Credentials > OAuth client ID.
- Follow the prompts to configure the OAuth consent screen (if you haven't done so).
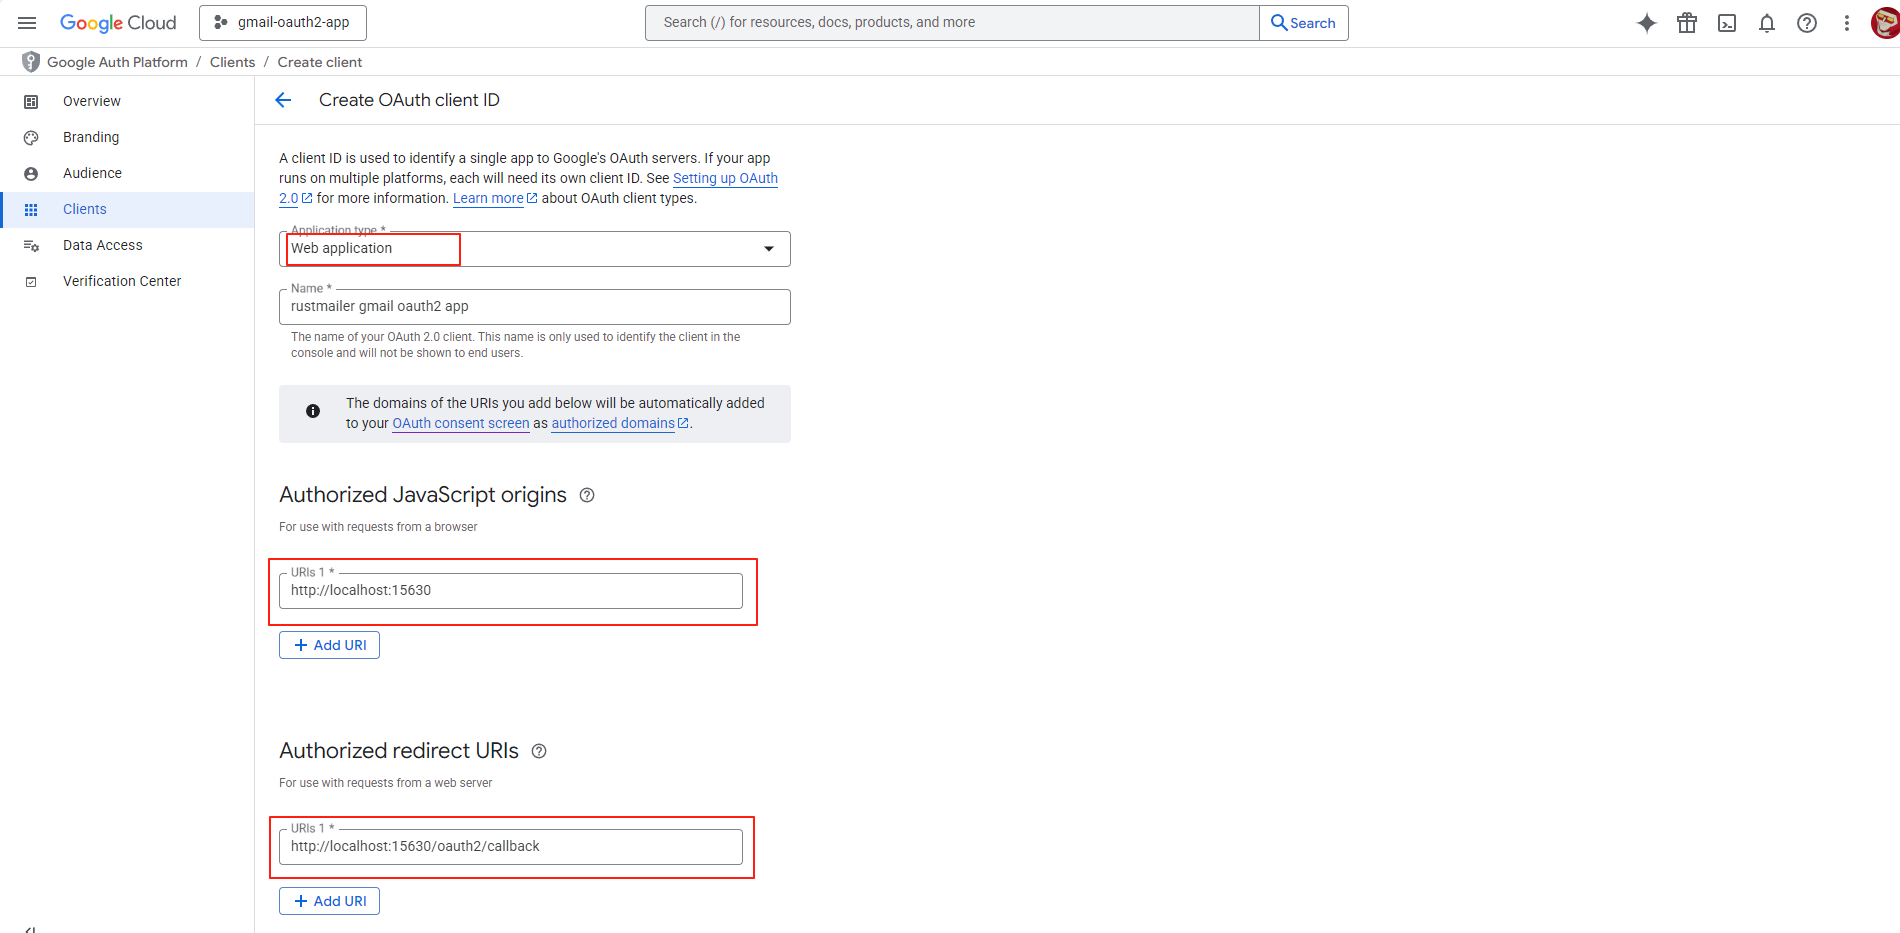
- Select the application type (Web application) and provide necessary details like authorized redirect URIs.
- Create the OAuth client and save the client ID and client secret for later use.
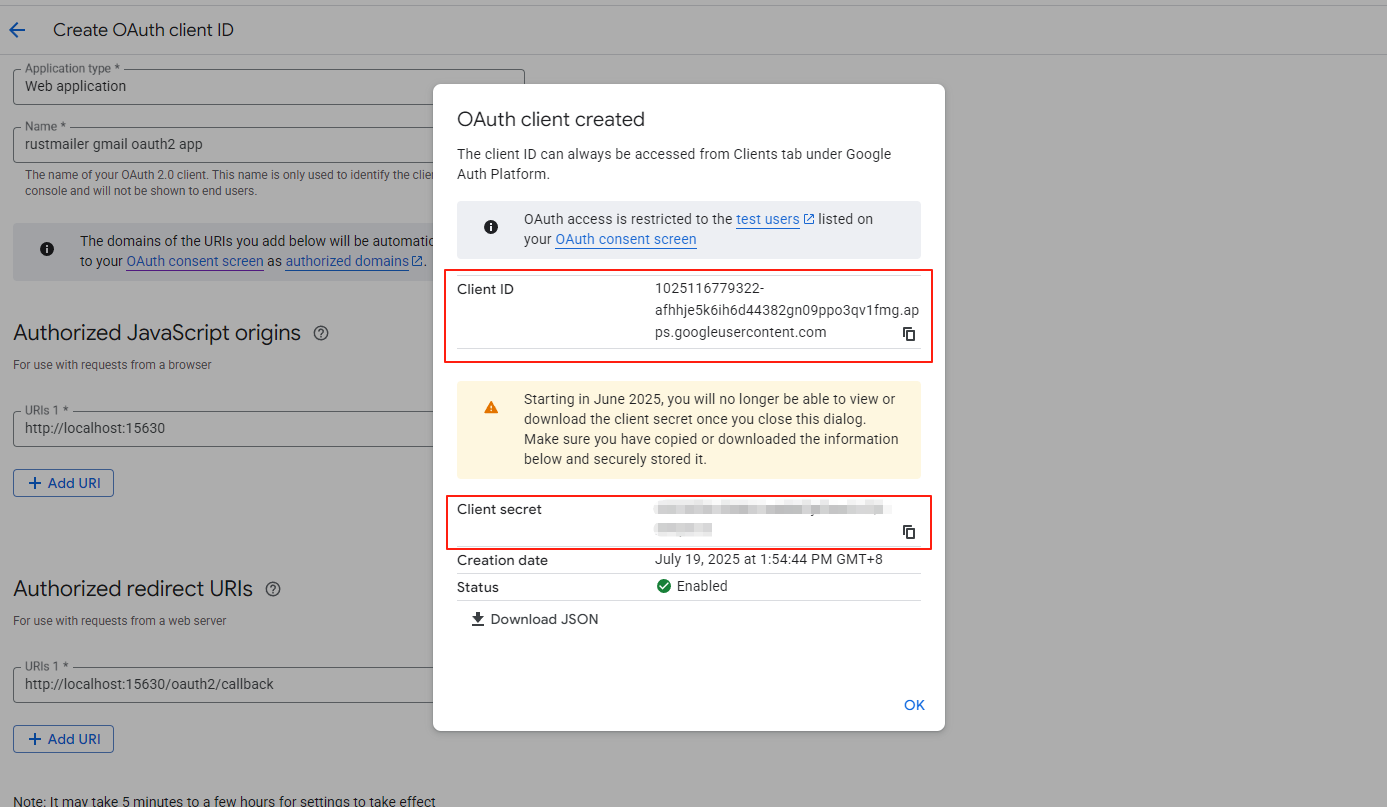
You do not need to enable the Gmail API since IMAP access uses standard mail protocols with OAuth for authentication.
- The Application type must be Web application.
- Set Authorized JavaScript origins to
http://localhost:15630. If your RustMailer runs with HTTPS, replacehttpwithhttpsandlocalhostwith your real IP or domain. - Set Authorized redirect URIs to
http://localhost:15630/oauth2/callback(adjust the scheme and host as above). This path/oauth2/callbackis a RustMailer endpoint that handles the OAuth2 callback. - In this example, RustMailer is deployed on a laptop and the authorization is done on the same machine, so
localhostworks.
Step 3: Publish Your OAuth App
After creating your OAuth2 client, you need to publish the app.
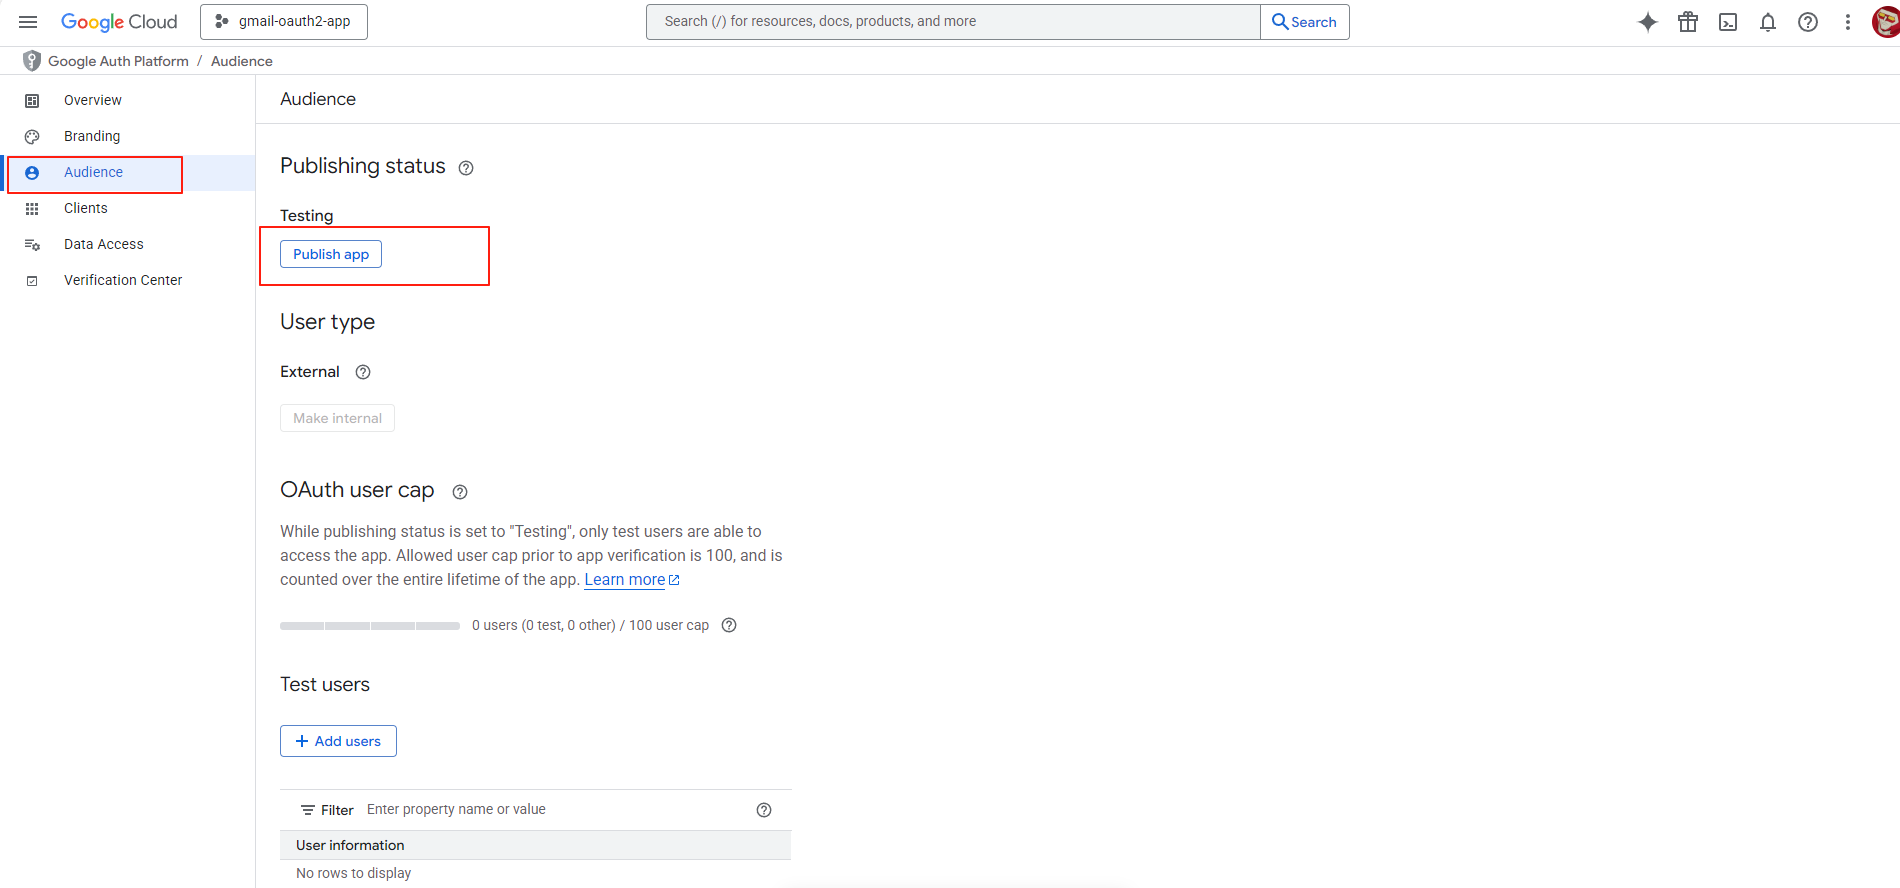 If the app remains in Testing mode, only test users can authorize it. To allow all users to use it, set the app status to Production.
You can do this by going to Audience, and then publishing the app.
Step 4: Add an OAuth2 App in RustMailer
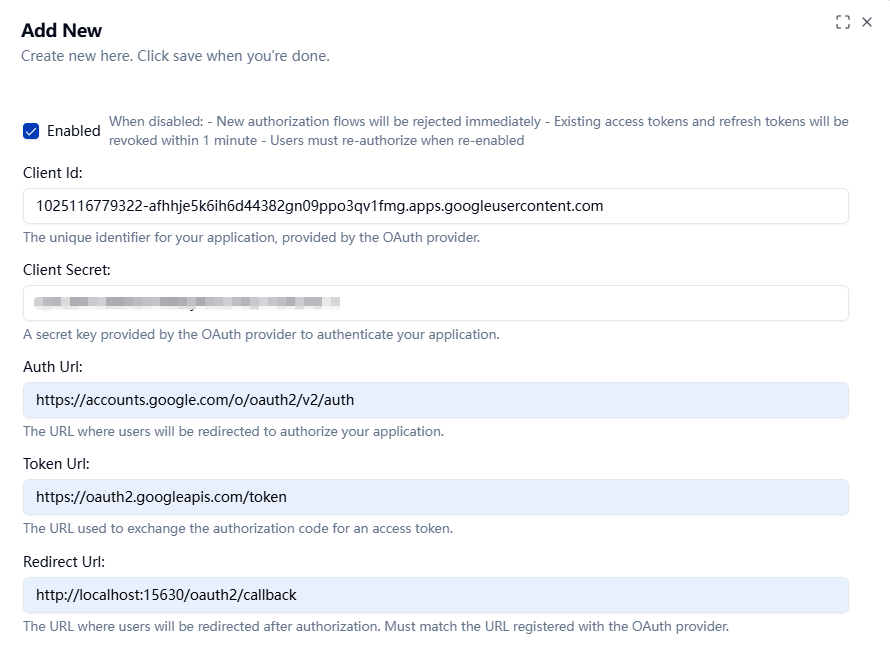
In RustMailer’s admin interface, go to OAuth2 Provider, and add a new app.
- Client ID: from Google Console
- Client Secret: from Google Console
 Click Save.
-
The Authorization URL is fixed:
https://accounts.google.com/o/oauth2/v2/auth -
The Token URL is fixed:
https://oauth2.googleapis.com/token -
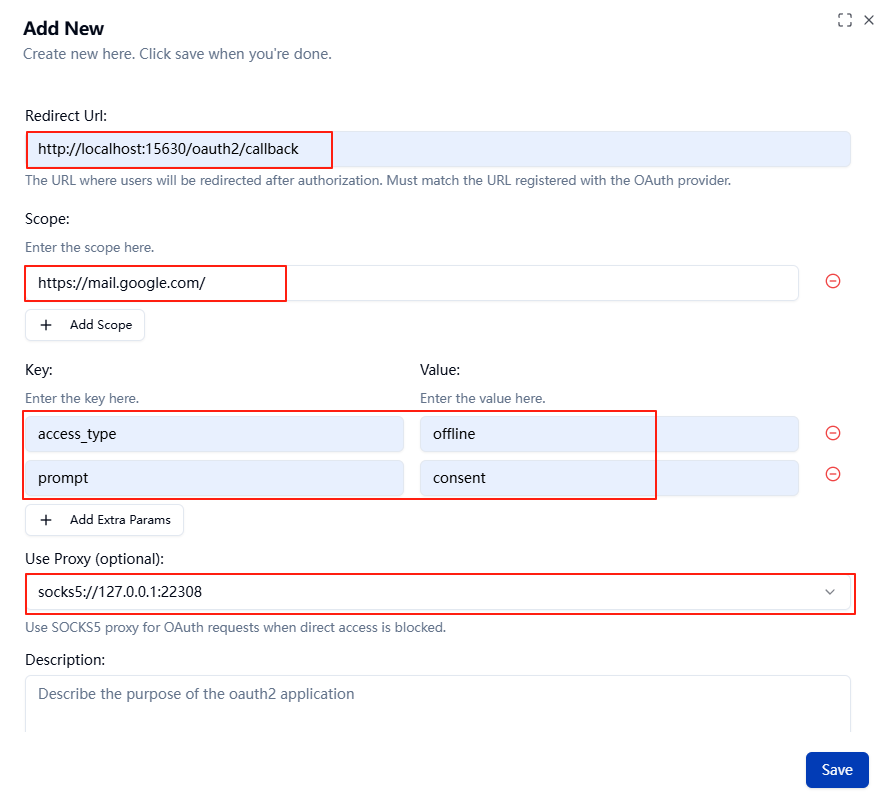
The Redirect URL must exactly match the one you set in the Google Cloud Console (e.g.,
http://localhost:15630/oauth2/callback). This is the callback endpoint in RustMailer that handles the OAuth response. -
Common OAuth parameters used by RustMailer: -
scope: Usually set tohttps://mail.google.com/to allow full IMAP access. -access_type=offline: Requests a refresh token to enable long-lived access. -prompt=consent: Ensures the consent screen is shown every time to get a refresh token.
Make sure these URLs and parameters are correctly configured; otherwise, the OAuth flow will fail.
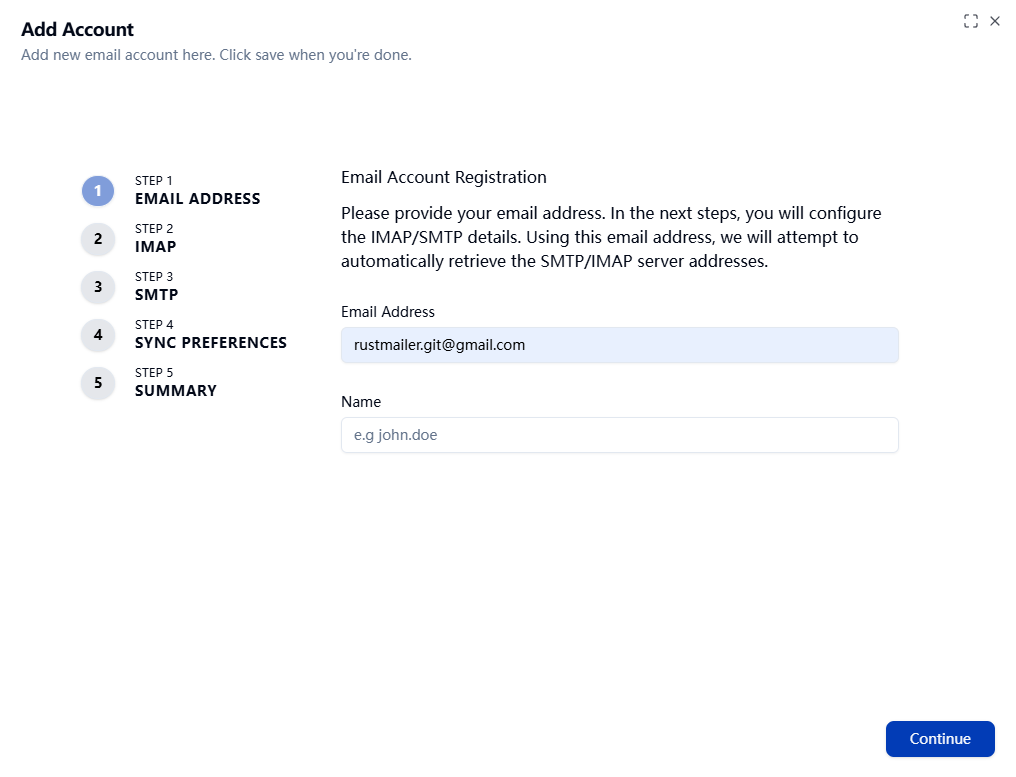
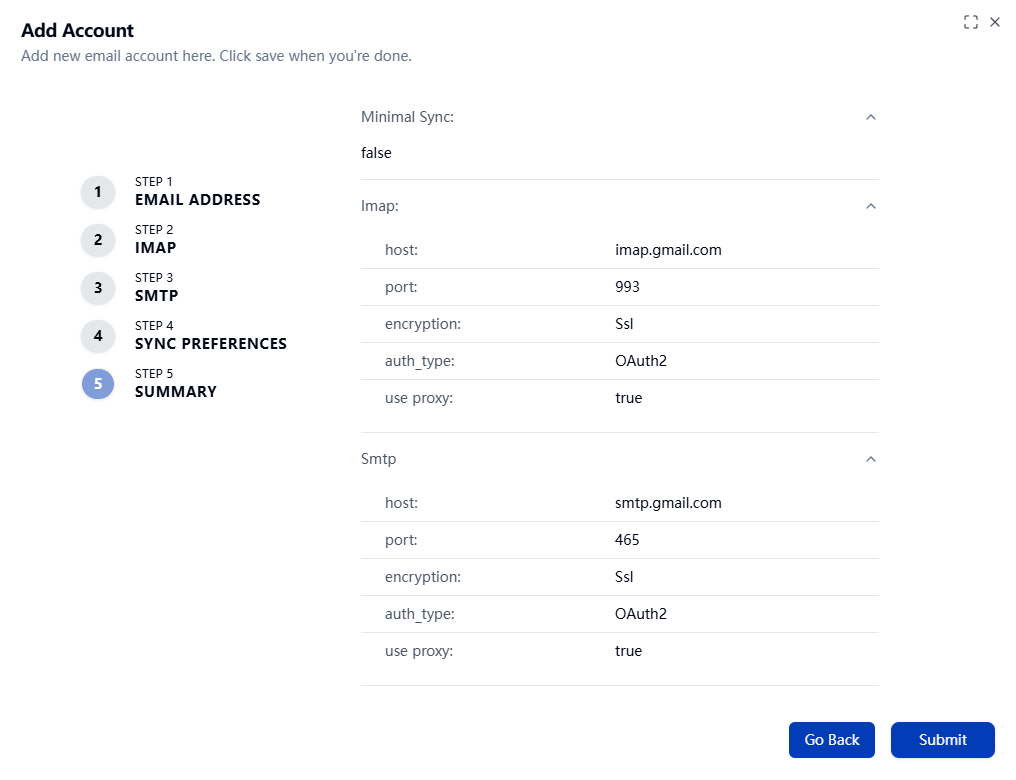
Step 6: Add an Email Account
Navigate to Accounts and click New Account.
- Email Address: your Gmail address
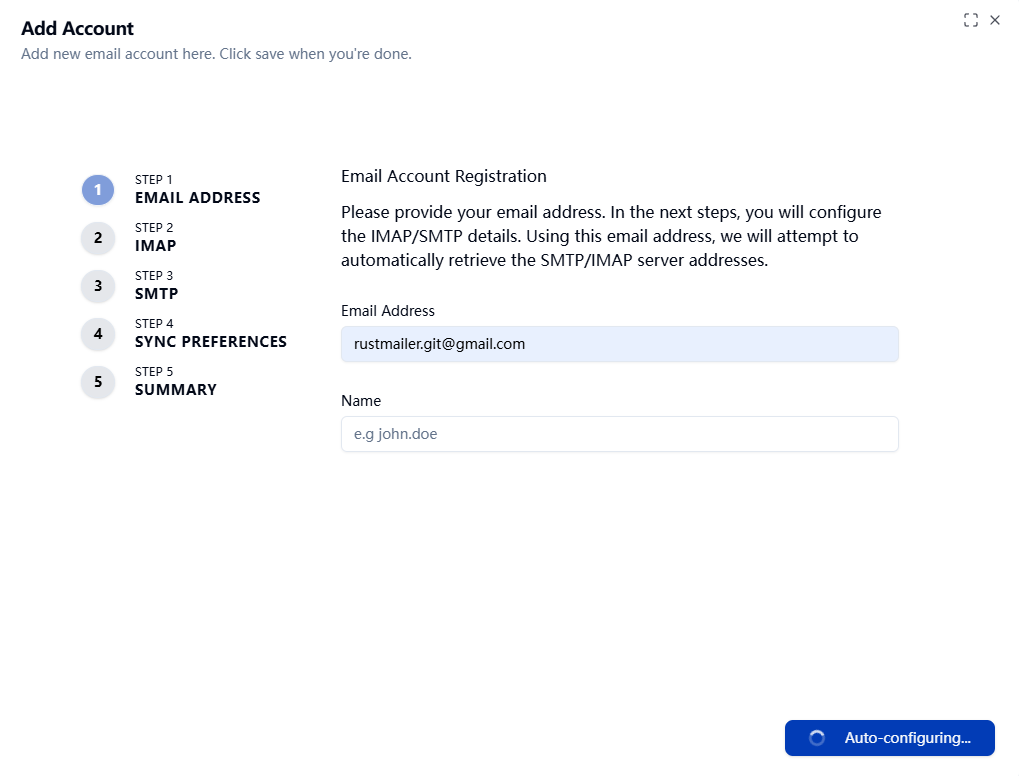
RustMailer will automatically retrieve Gmail IMAP/SMTP configs via autoconfig.
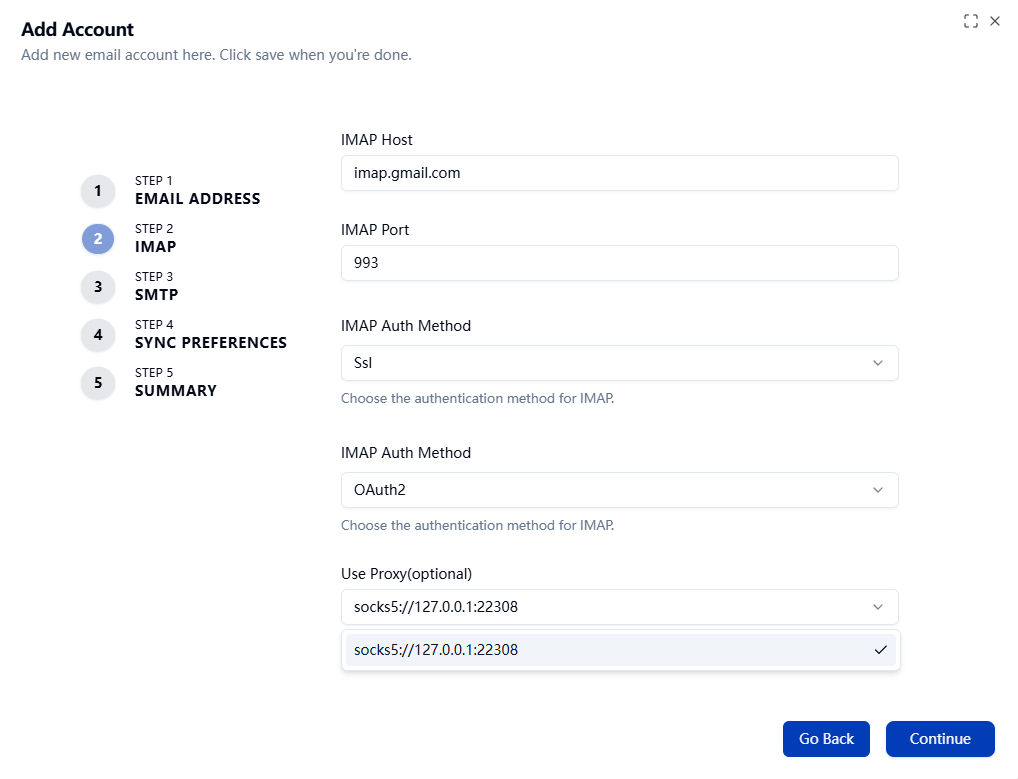

When adding a Gmail account, I chose to use a proxy. Depending on your network environment, you may choose to use a proxy or not.
- If a proxy is configured, both IMAP and SMTP connections will go through it.
- If the proxy service is stopped or becomes unavailable, IMAP and SMTP connections will fail.
Use a proxy only if your environment restricts direct access to Gmail.
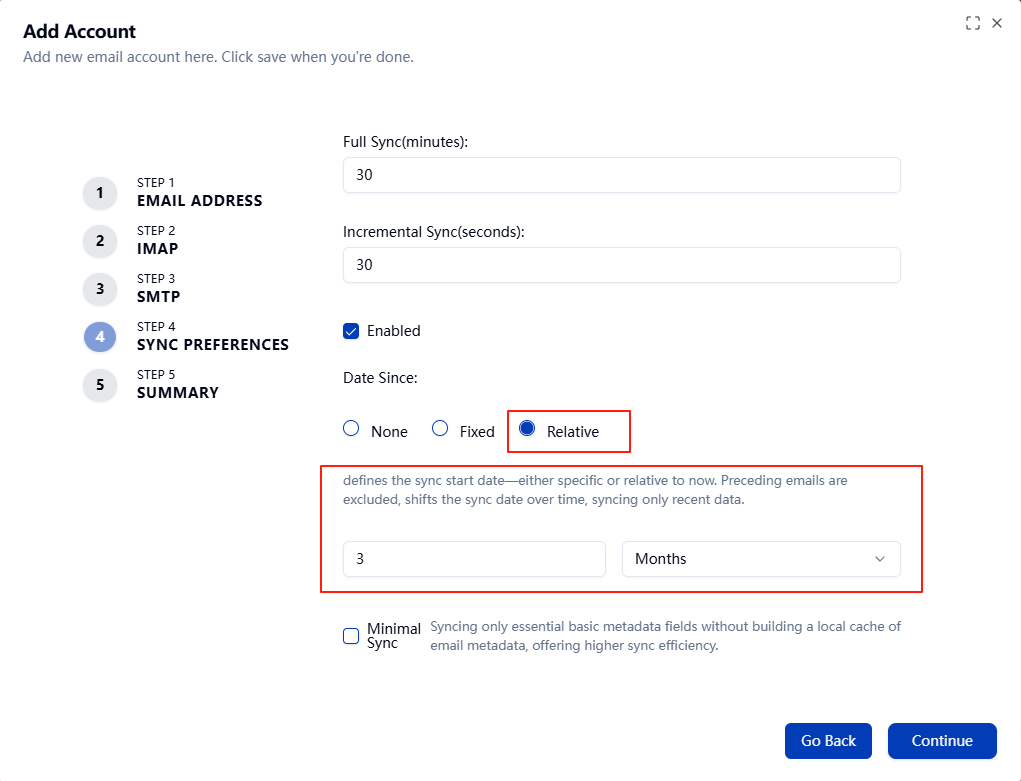
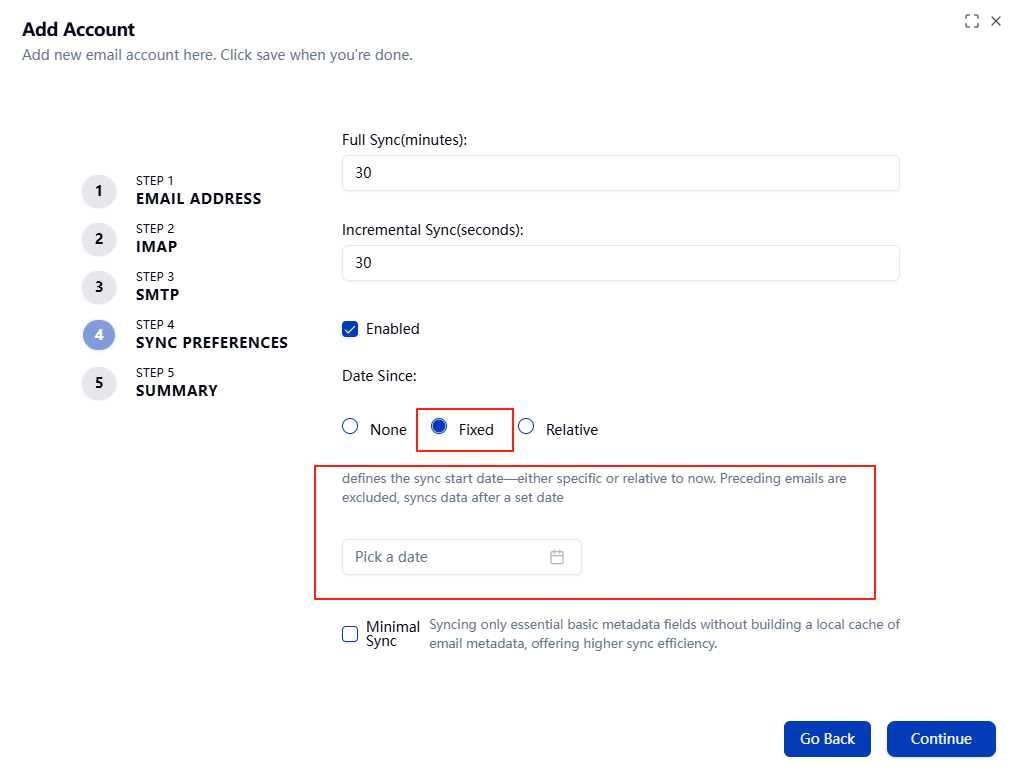
When configuring email account sync in RustMailer, you can choose a time range to limit which emails are synchronized.
This is useful for accounts with a large number of historical emails (e.g., hundreds of thousands), where you only care about recent ones.
- You can select: - A sliding time window (e.g., last 3 months) - An absolute start date (e.g., from 2024-01-01 onward)
RustMailer will automatically apply this logic during synchronization.
Additionally, if you do not need to cache email metadata such as subject, sender, or recipient, you can enable minimal mode.
- In
minimalmode: - RustMailer skips storing local envelope metadata - The built-in email viewer will fetch data directly from IMAP, without using local cache
Use minimal mode to reduce storage and sync overhead when local indexing is unnecessary.
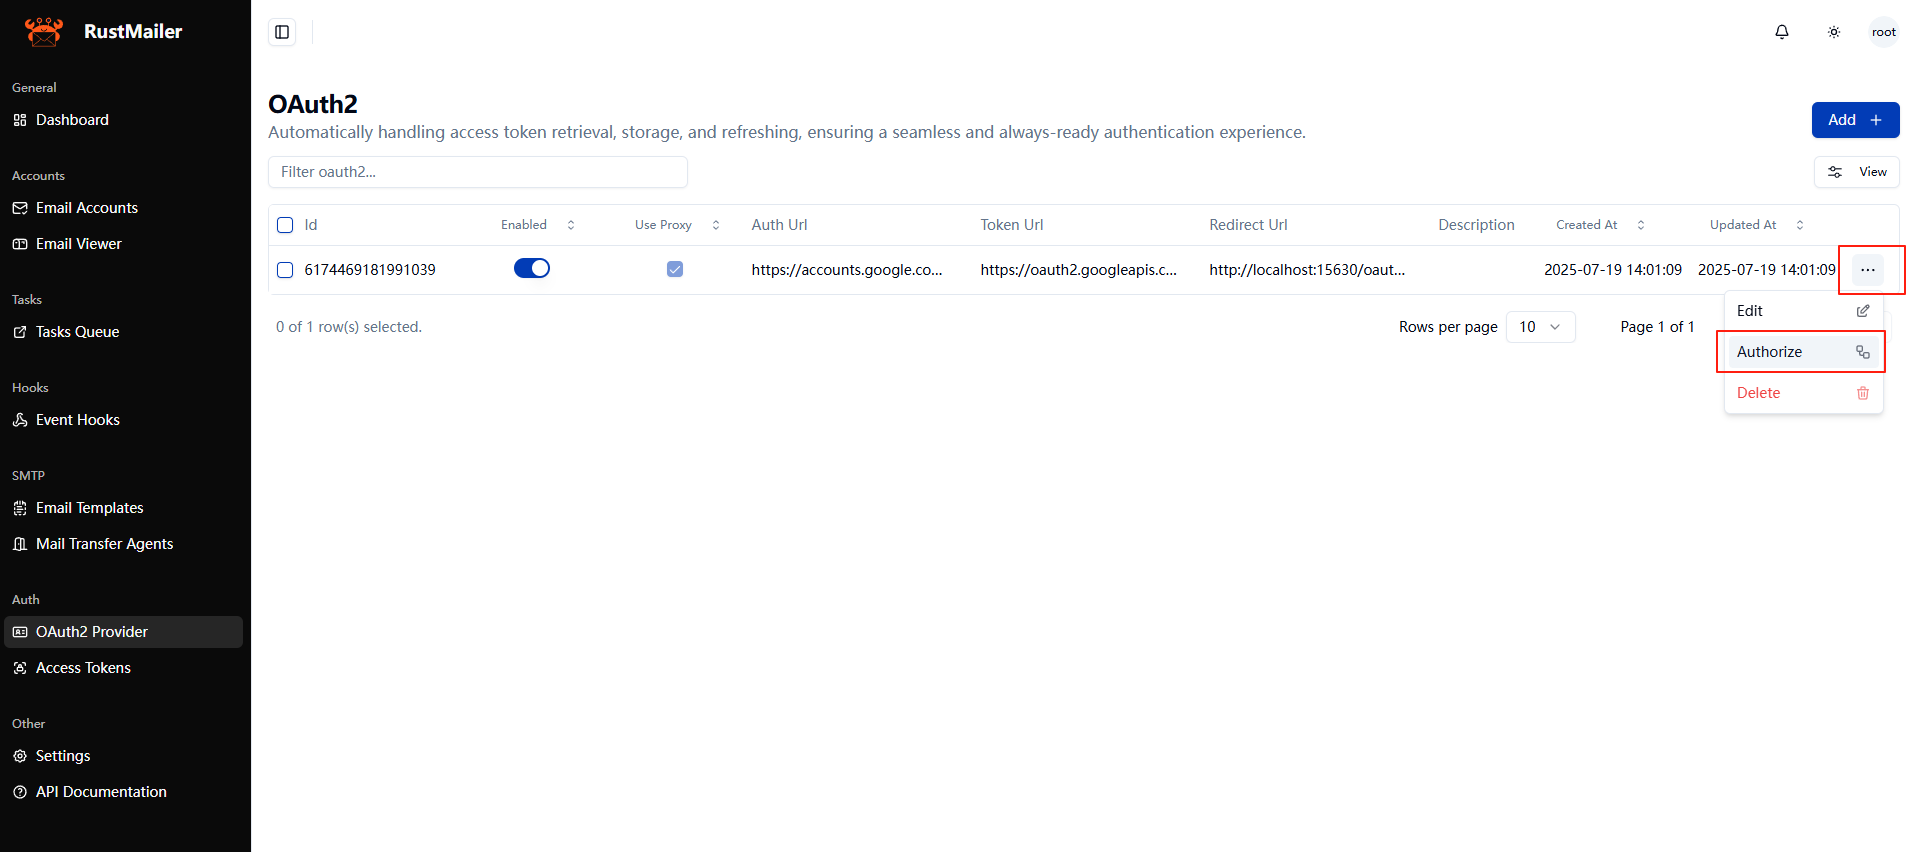
Step 7: Start the Authorization Flow
After creating the Gmail account, switch to the OAuth Provider tab and select the OAuth2 configuration you created earlier.
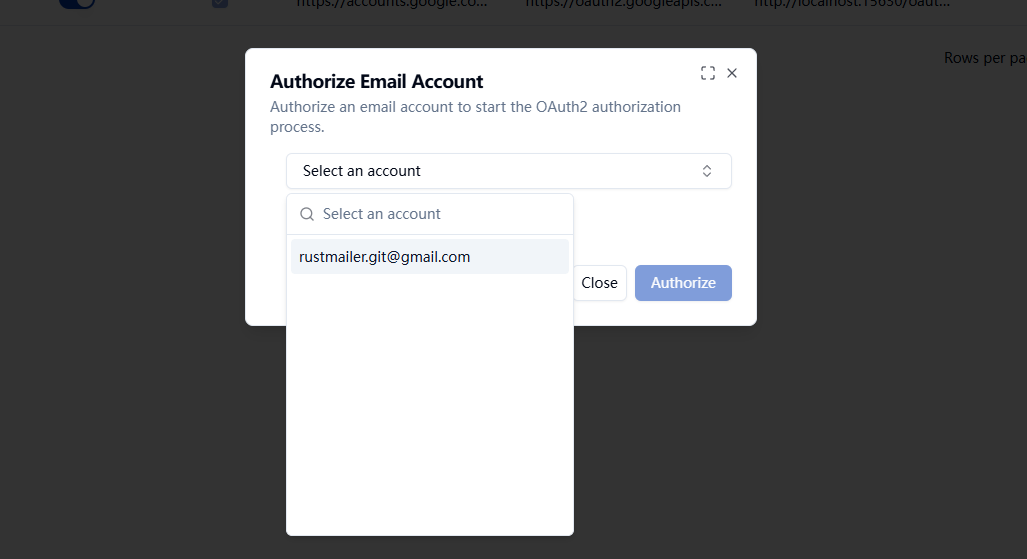
Then, in the right toolbar, click Authorize and choose the Gmail account you just added to start the OAuth2 flow.
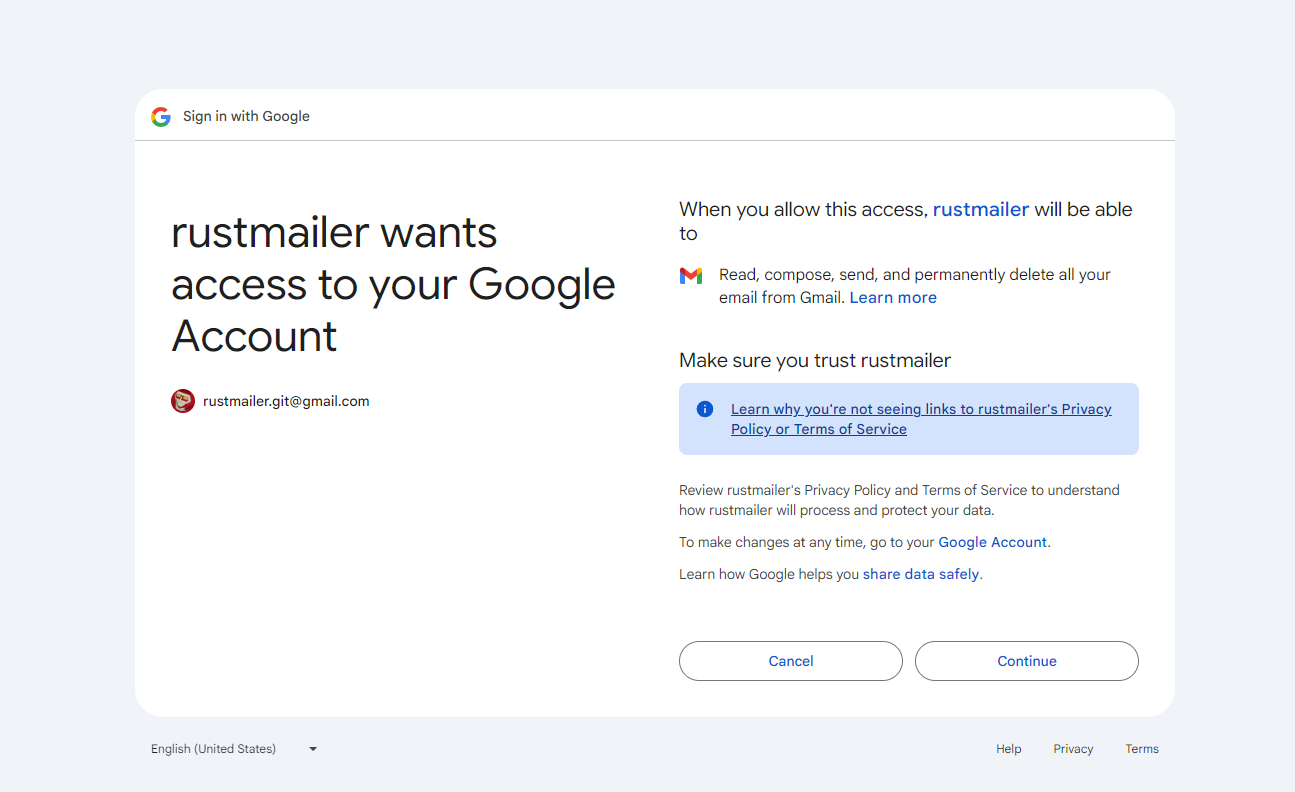
You will be redirected to Google's login and authorization page.
In Google's OAuth model, a single Google Cloud project (with its OAuth client) can request access to any Gmail account, as long as the user grants permission.
This means you only need to create one OAuth2 client, and then you can authorize access to multiple Gmail users — one at a time — using the same client credentials.
The authorization flow ensures that each Gmail user explicitly consents to allow your RustMailer instance to access their mailbox via IMAP.
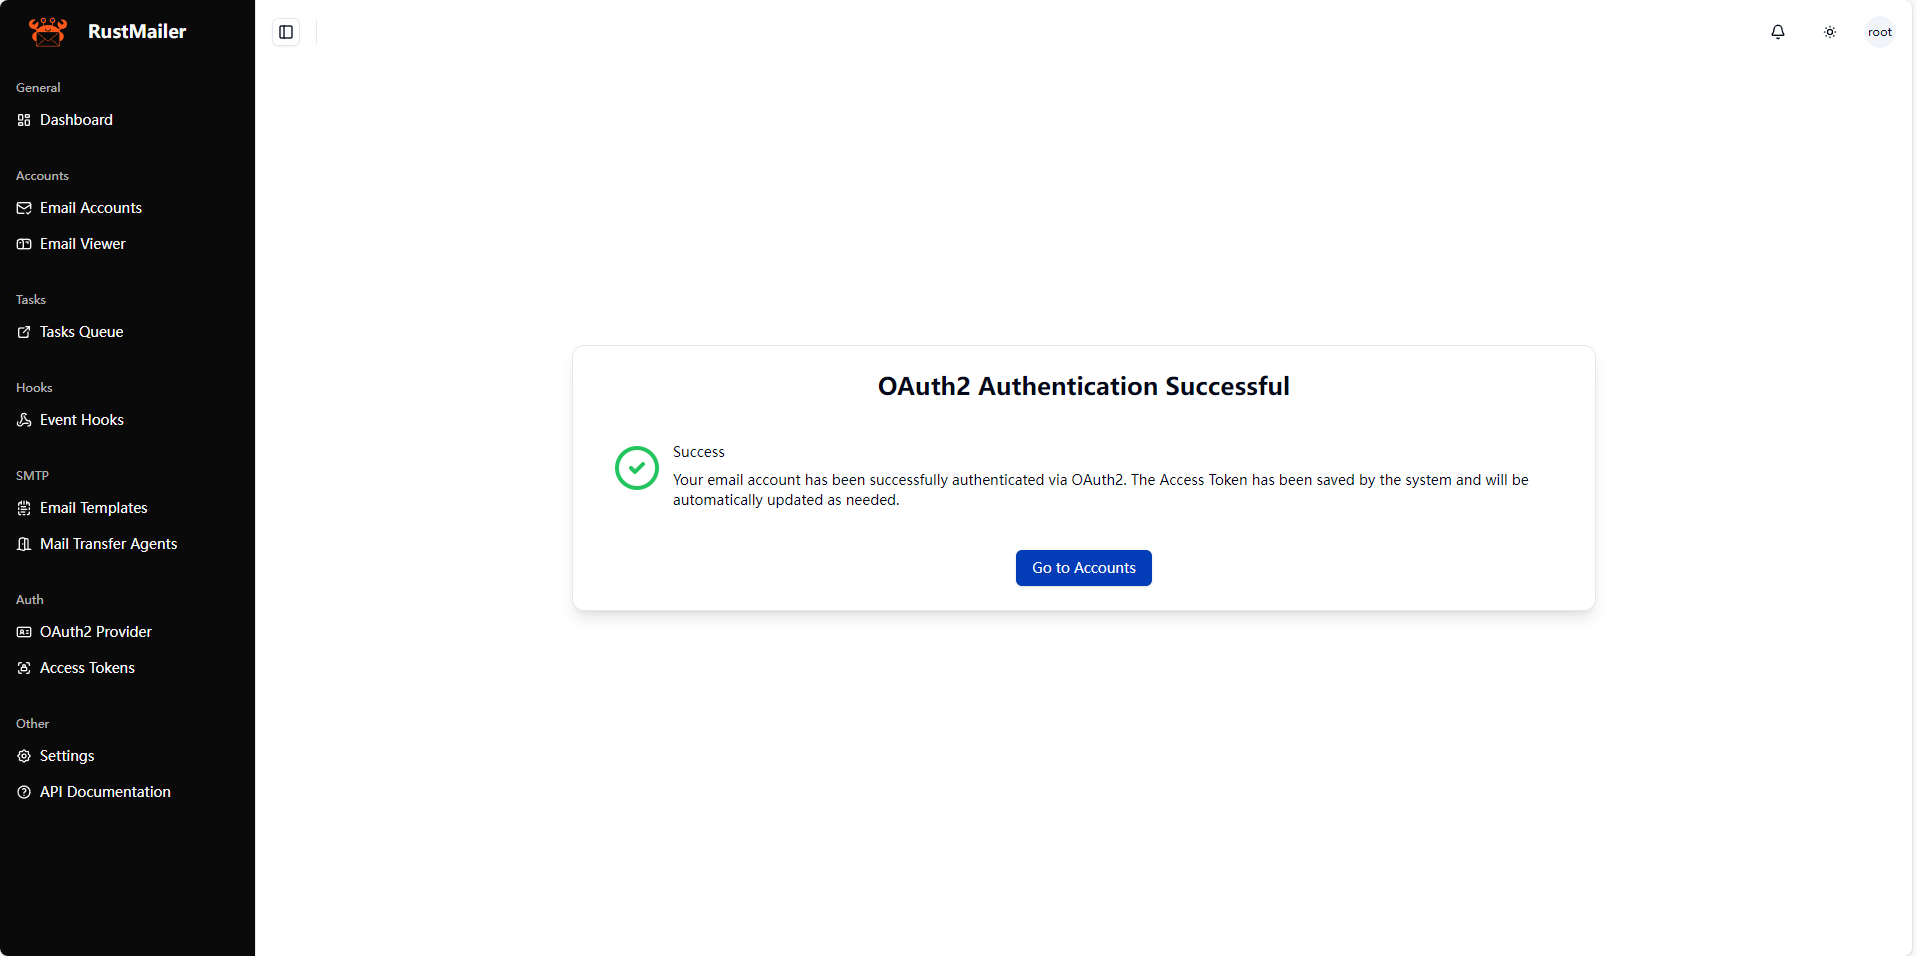
If you see the message "OAuth2 authentication successful", it means RustMailer has successfully obtained the access token and refresh token for the Gmail account.
RustMailer will then:
- Use the access token to authenticate with Gmail's IMAP server
- Automatically refresh the token periodically in the background to prevent it from expiring
This ensures a seamless and stable IMAP connection without requiring you to reauthorize manually.
Step 8: Sync Status
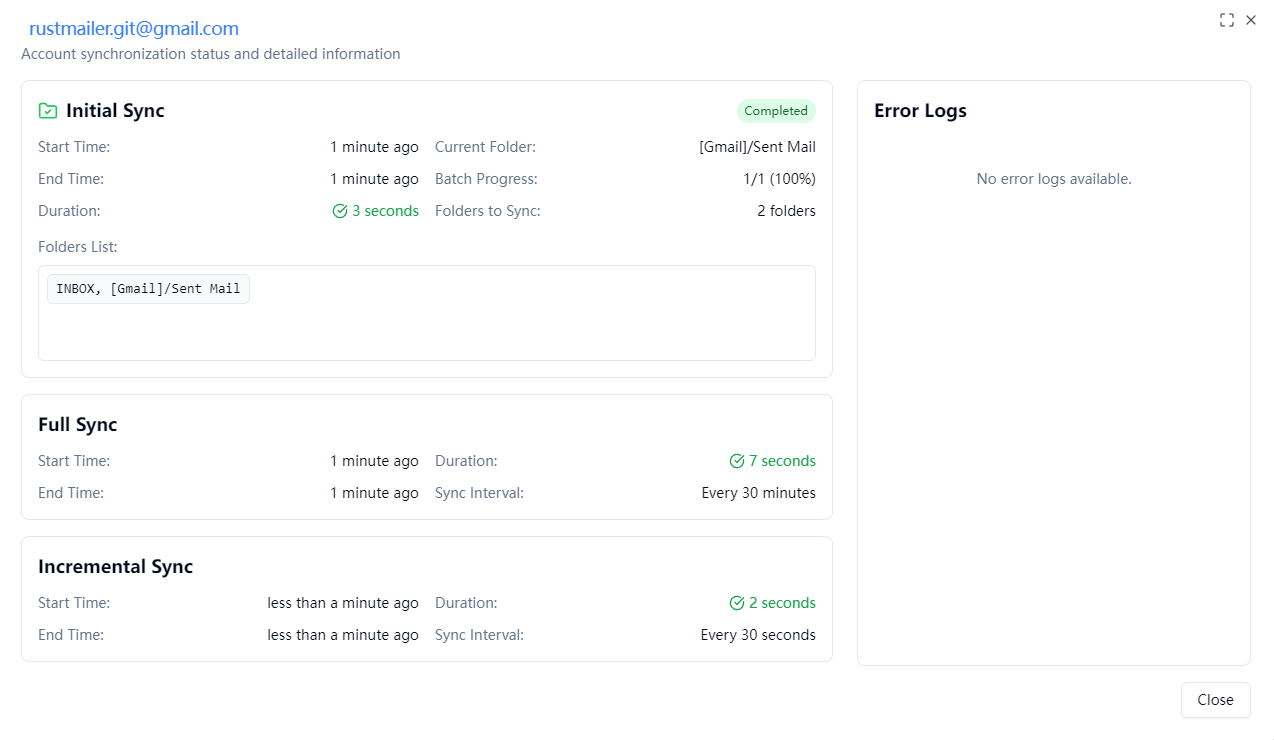
Once authorized, RustMailer will begin syncing your email data.
You can monitor the sync status in the Accounts page.
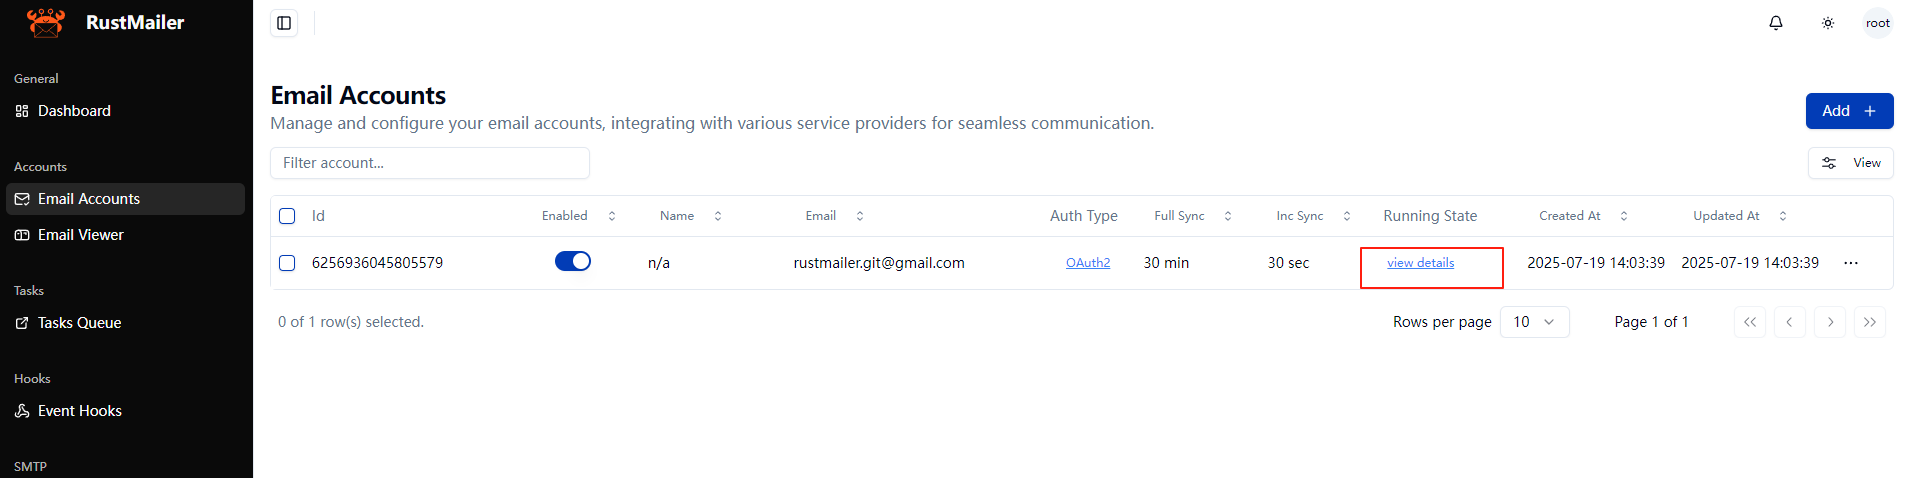
Step 8: Sync Status
Once authorized, RustMailer will begin syncing your email data.
You can monitor the sync status on the Accounts page.
By default, RustMailer only syncs the Inbox and Sent folders for each account.
If you need to sync additional folders (e.g., Archive, custom labels), you must manually configure them in the UI or via the API.
This design helps avoid unnecessary sync overhead and gives you fine-grained control over what to sync.
Why this design? IMAP folder names are often encoded (e.g., in modified UTF-7). RustMailer decodes them for you and displays readable names, so you don't need to worry about encoding issues. When specifying which folders to sync, simply use the decoded folder names returned by RustMailer — no need to handle raw IMAP encoding yourself.
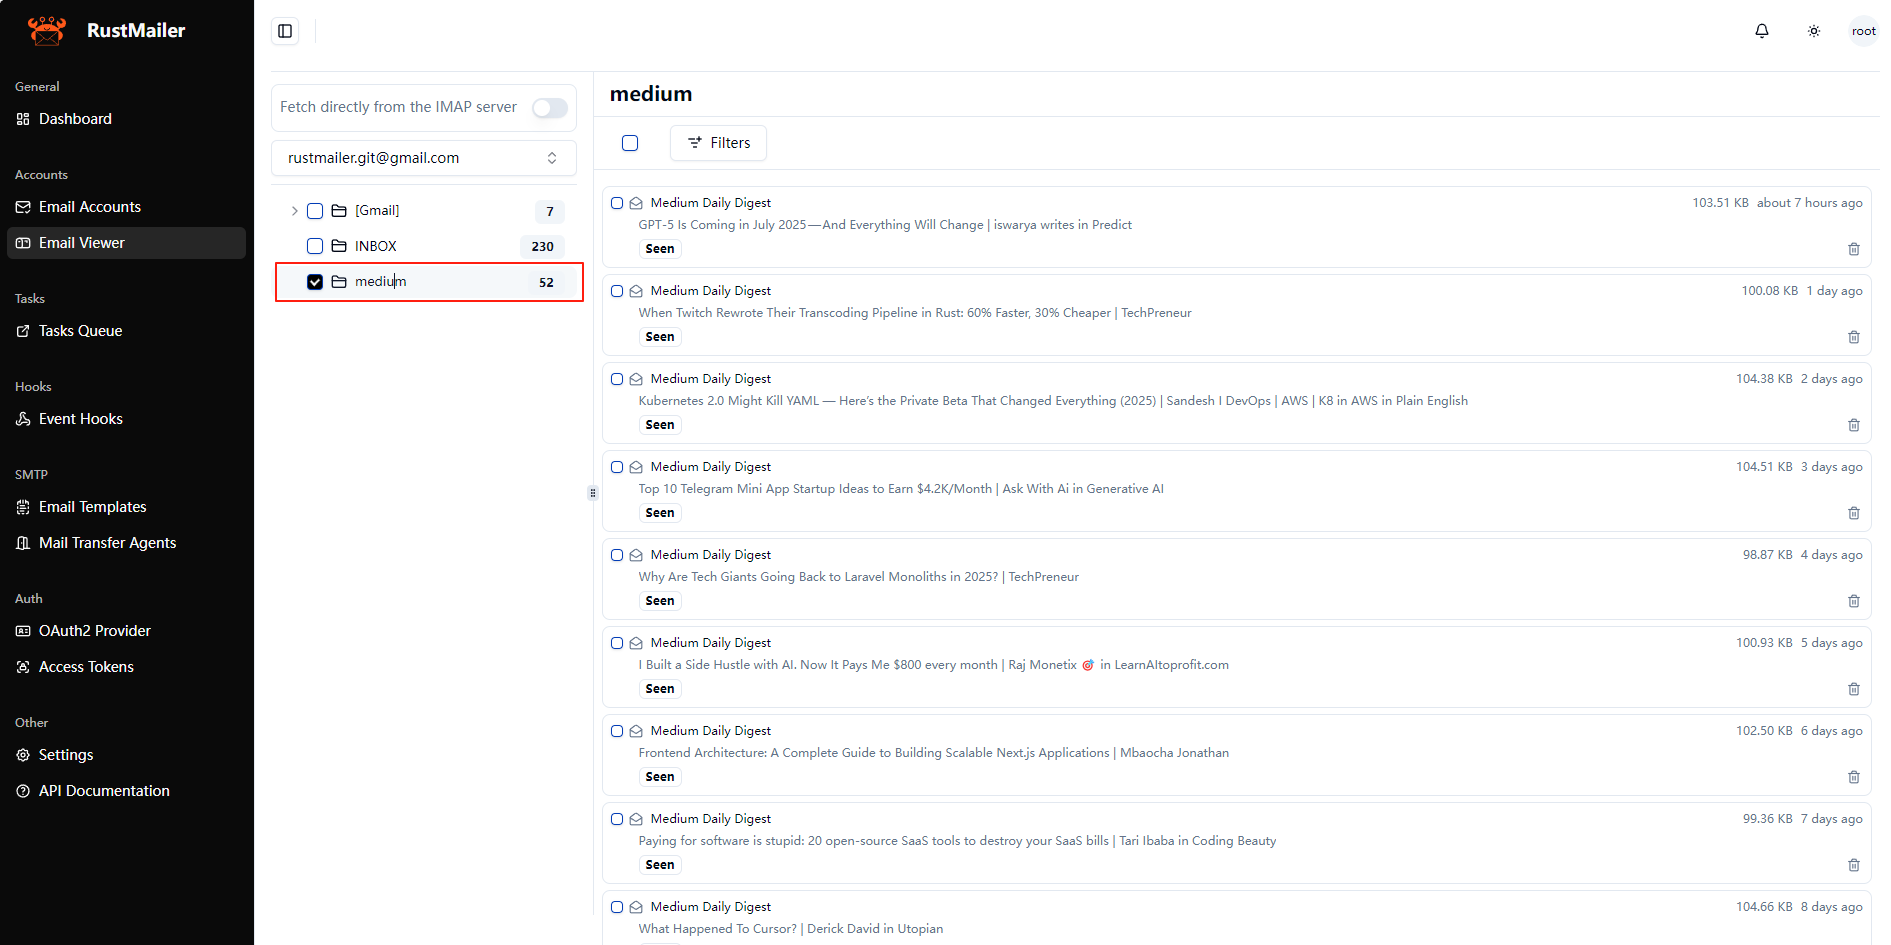
Step 9: Explore with Email Viewer
Go to Email Viewer and select your account to view incoming emails.
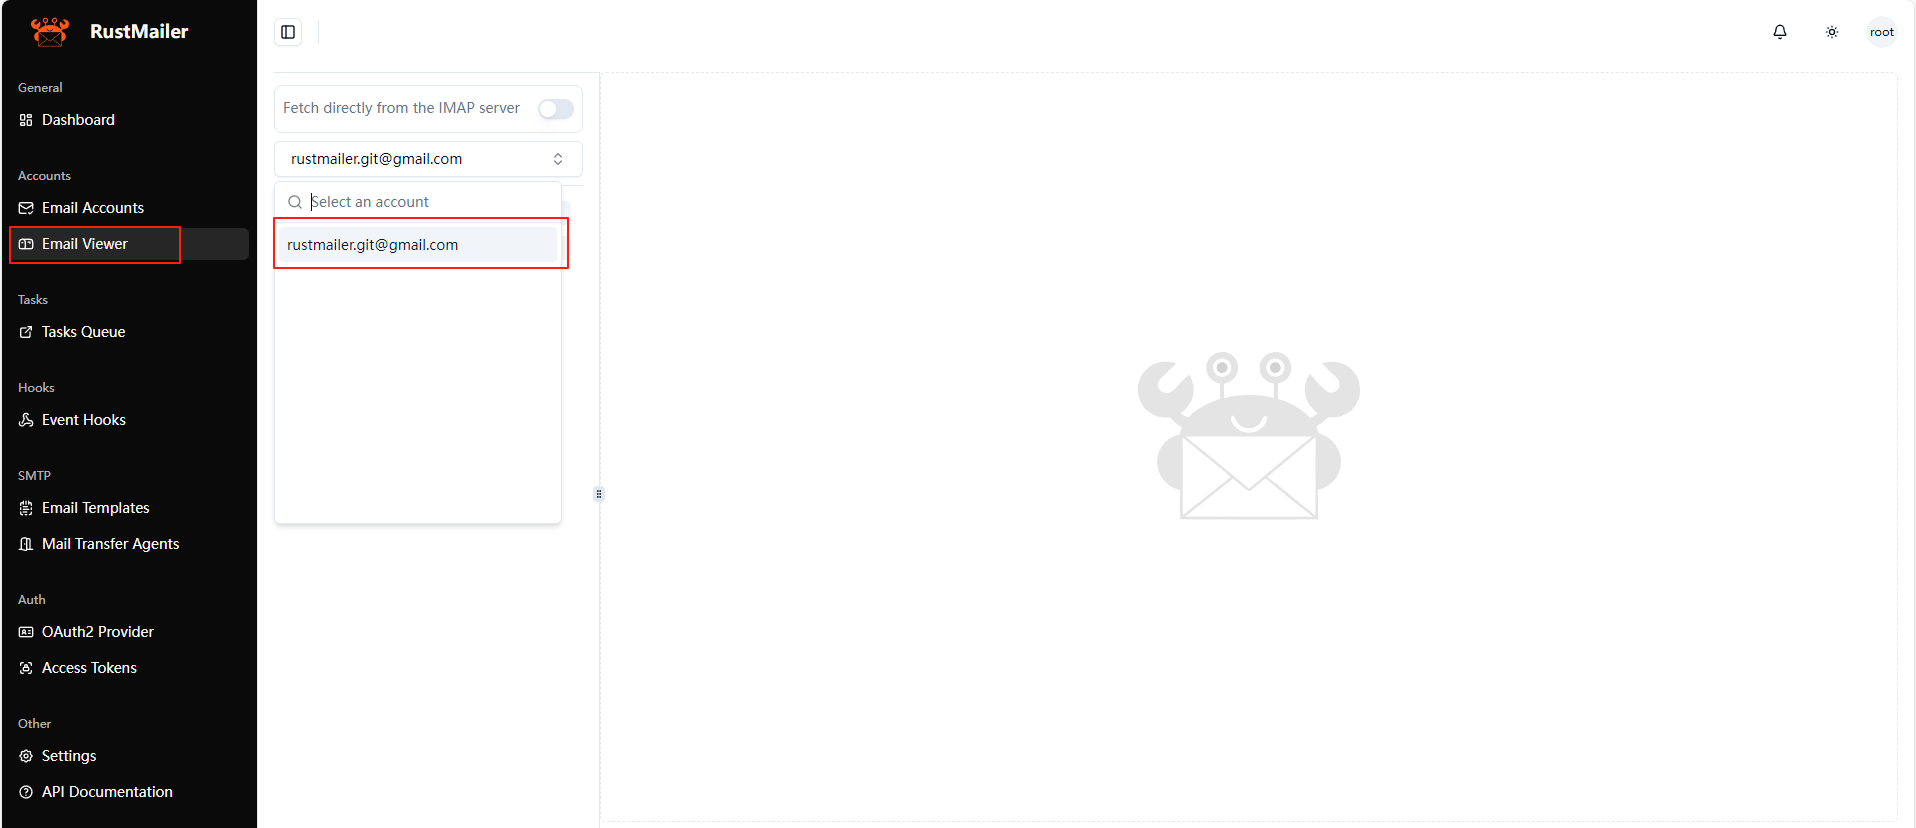
 The Email Viewer is designed primarily as a developer tool — a minimal email client built to help debug and verify email sync behavior.
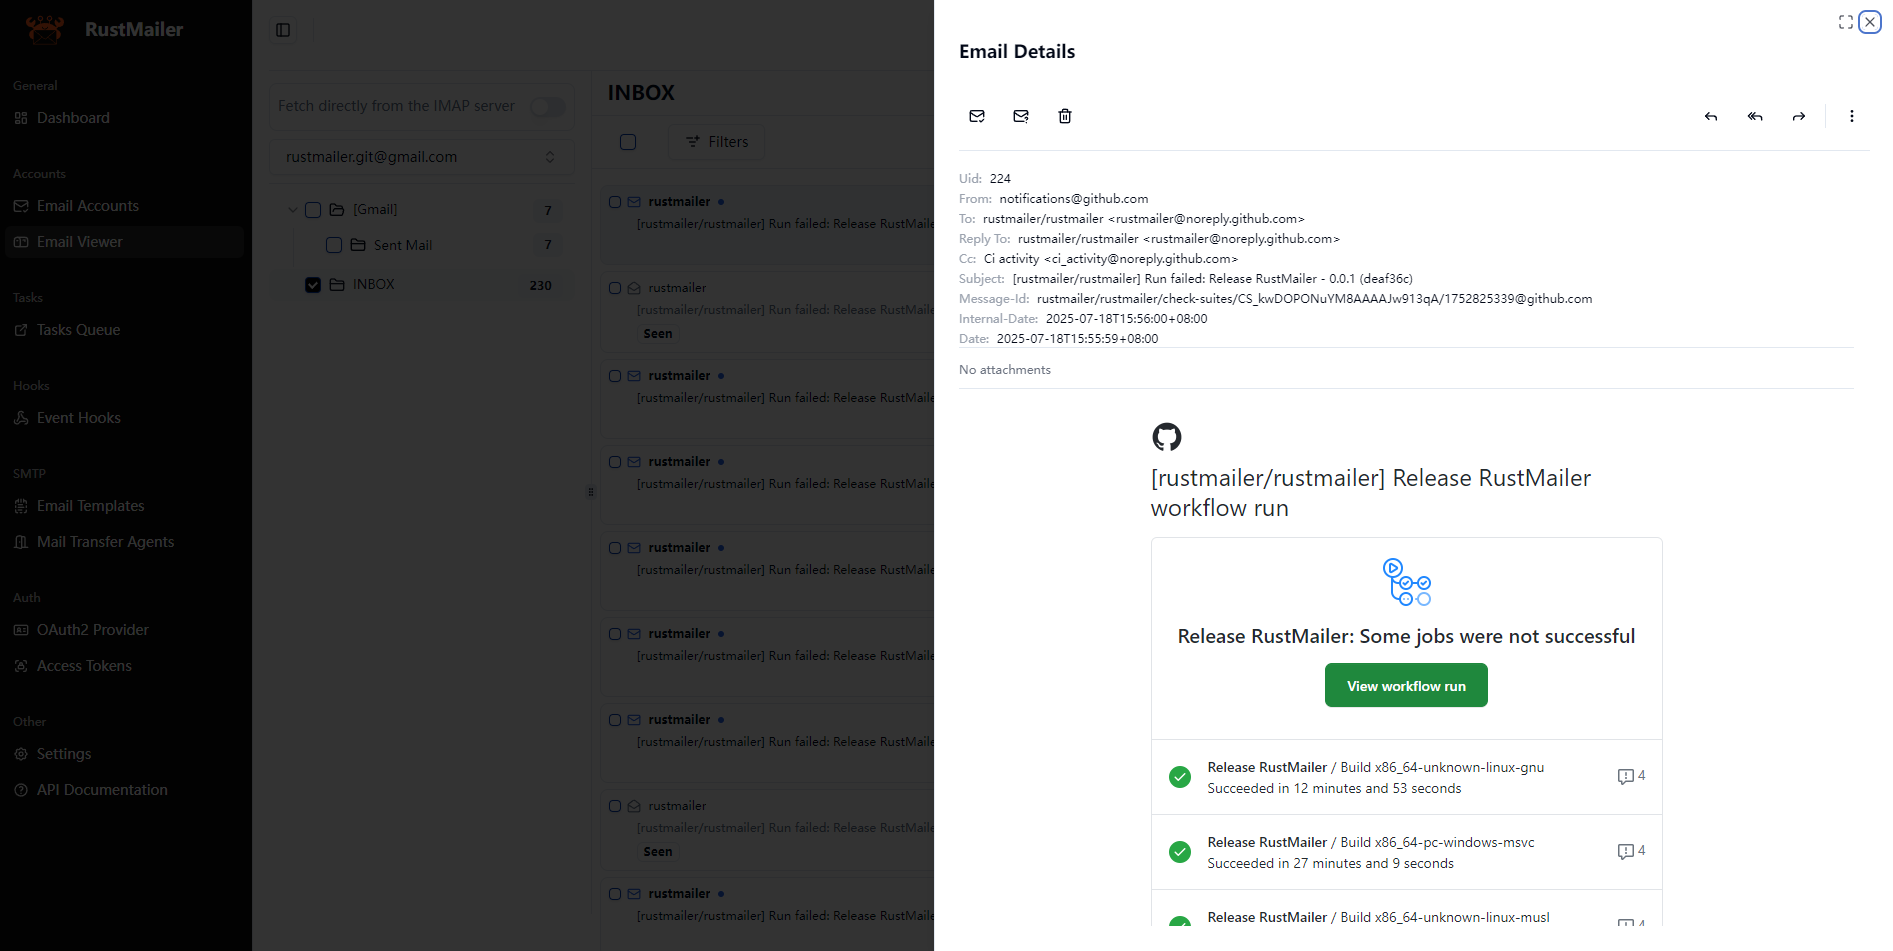
You can:
- Browse folders and view message headers
- Download full emails in
.emlformat - View and download attachments
- Reply to or forward messages
Email Viewer is intentionally simple and rough around the edges. Its goal is not to compete with or replace existing email clients — there are already many great ones out there.
Instead, it’s here to help you test and inspect how RustMailer handles email data under the hood. Thanks for your understanding!
Step 10: Select Sync Folders
To customize which folders are synced, go to the account page and click Sync Folders.
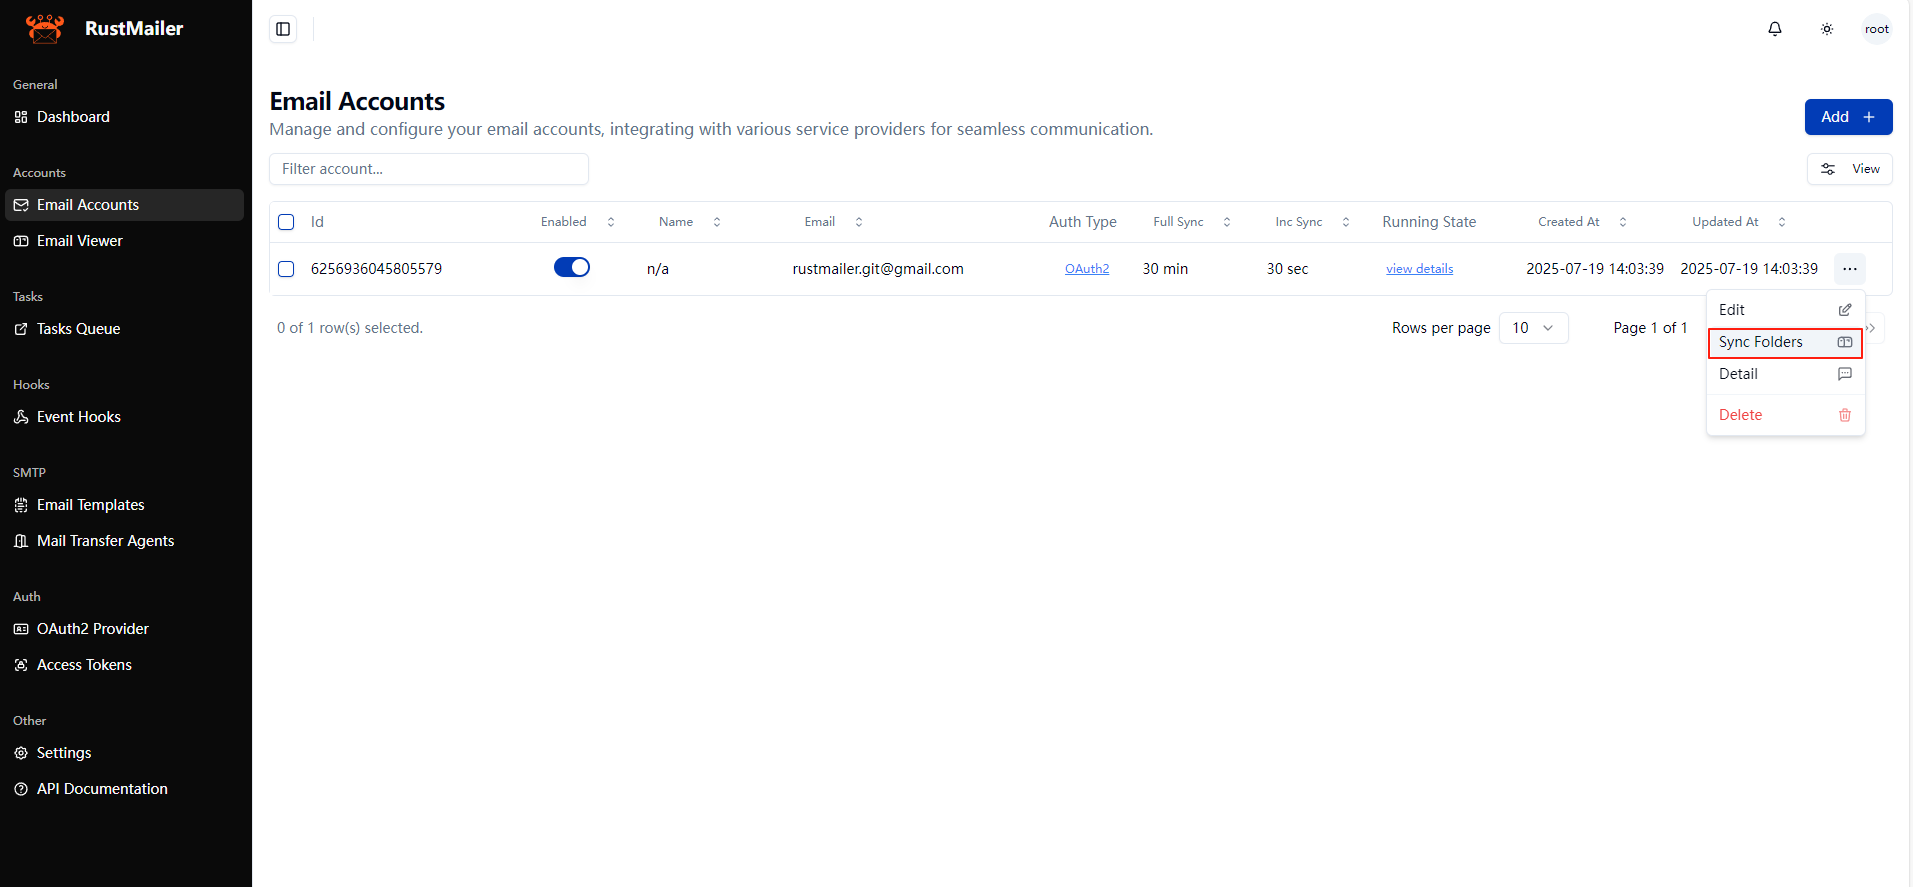
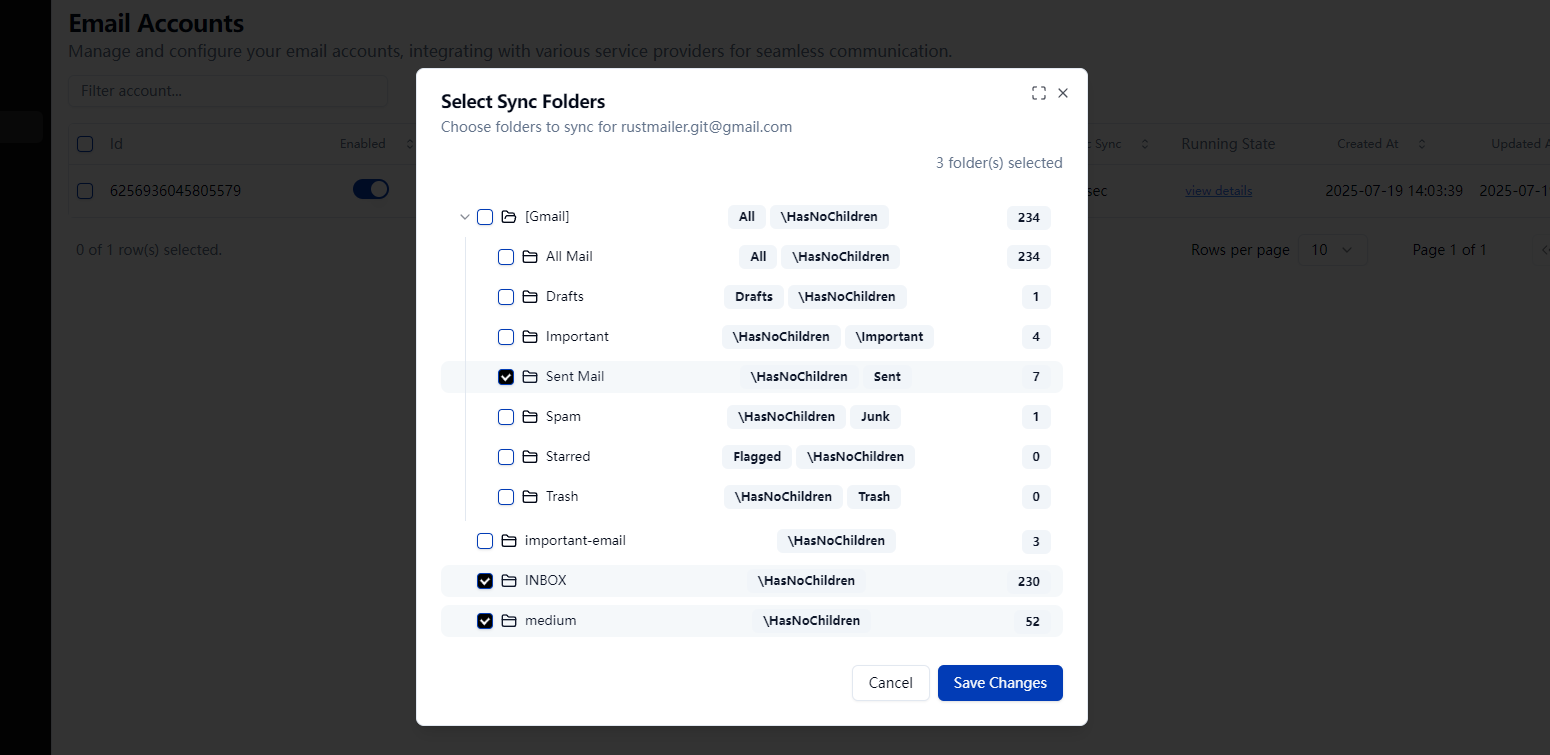
This is where you choose which folders RustMailer will sync.
In Gmail, many labels are exposed as IMAP folders. If a label is configured as IMAP-visible in Gmail, it will appear here and can be selected for synchronization.
Selecting only the folders you care about helps reduce unnecessary network and storage overhead.
Once you add new folders to sync, RustMailer will detect them during the next incremental sync and start syncing them automatically. You should see them appear shortly in the Email Viewer.
Conclusion
That's it! You've successfully integrated a Gmail account into RustMailer using OAuth2.
This flow works not only for Gmail, but for any IMAP/SMTP provider that supports OAuth2.
Through this guide, you should now have a clear understanding of:
- How to create and configure a Google OAuth2 client
- How to connect a Gmail account to RustMailer
- How the sync and folder selection process works
If you find RustMailer useful, consider starring us on GitHub!
Your feedback and support help us keep improving 🚀